Showing posts with label DIY. Show all posts

DIY Hair Ties

/ Wednesday, January 29, 2014 /
Ribbon hair ties are now all the rage. They have replaced hair bands as the next "cool ponytail thing". They are cool because they not only are stylish, but they also tie hair up without kinking it.

They are also super expensive, however, When I went on Sephora's website the other day, I found that the cheapest ones were sold at $9 for a pack of 8. That's $1.125 for each hair tie. Ridonculous.

I then thought, "why not let this be the next DIY project?"

Thus, adapting from instructions from The Spohrs Are Multiplying, I bought some 5/8'' fold over elastic on Etsy and went into action.


The package of elastics

The elastics were a grab-bag of colors, all 1 yard long. I divided each elastic into 4 even pieces of about 9 inches in length. Then I folded each nine-inch piece in half and tied off the end.


Voila! Beautiful hair ties!

I bought a package of 40 yards of elastic for $10. Adding shipping cost me only $13.95. 40 yards yields 160 hair ties. That's about 10 cents for each hair tie. Sephora came out with a 1254.48% mark-up!!!

I'm gonna give these to friends as little stocking stuffers and other gifts. I think it'll be fun combining different colors. Such a cute, fun DIY that's also super affordable, and saves your gal pals' $$ as well!

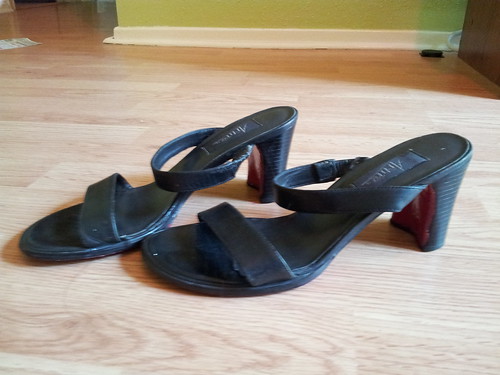
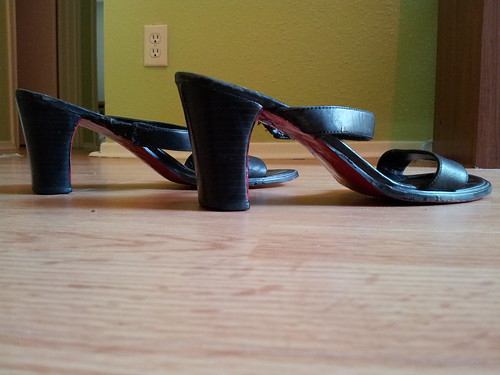
My DIY Christian Louboutins

/ Sunday, October 13, 2013 /
The time I will be able to truly buy Christian Louboutins is when I actually become a real doctor. But until then, I wanted to try a makeshift way to create a somewhat semblance of them...

Tools:
Acetone (100%)
Rubbing alcohol (70%)
Cotton rounds
1 pair of black shoes (or whatever high-heels you prefer)
Q-tips to clean up excess nail polish

Nail polishes:
Base coat and top coat: Revlon Multi Care Base+Top Coat
Base color: 1:1 mixture of ELF Essential Nail Polish in Fire Coral and Maybelline Express Finish #800 in Sultry Siren.

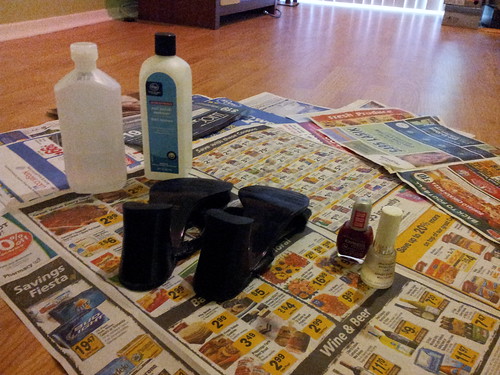
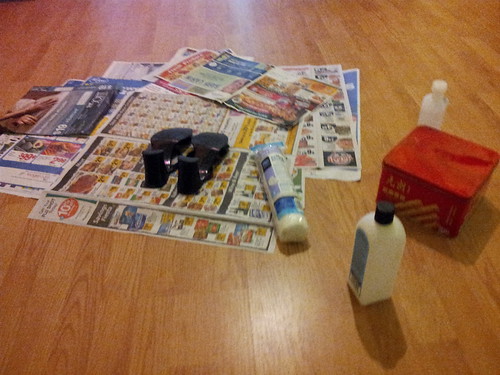
  20130912_093433
The setup


20130912_093753
Step 1: Clean the shoes with rubbing alcohol and cotton rounds.


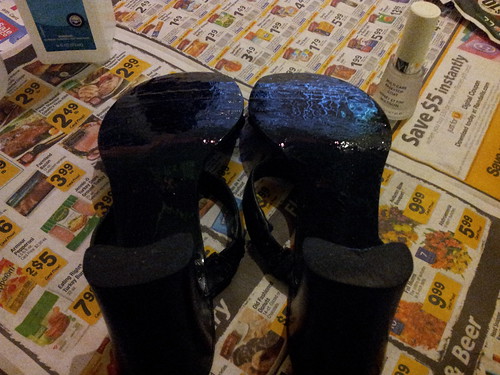
20130912_094326
Step 2: Apply a layer of topcoat.

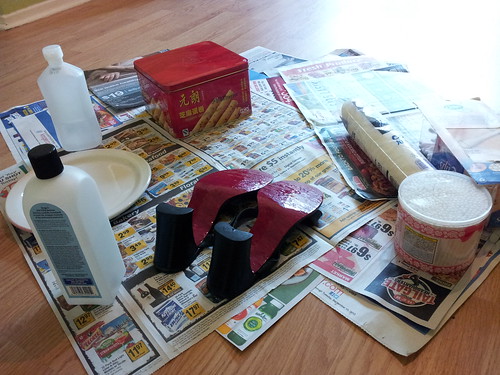
20130912_121846
Step 3: Apply 2 layers of the 1:1 mixture.


20130912_121912
Step 4: Apply 1 layer of top coat.

Step 5: Allow to dry for at least 3 hours (for good measure), preferably overnight.

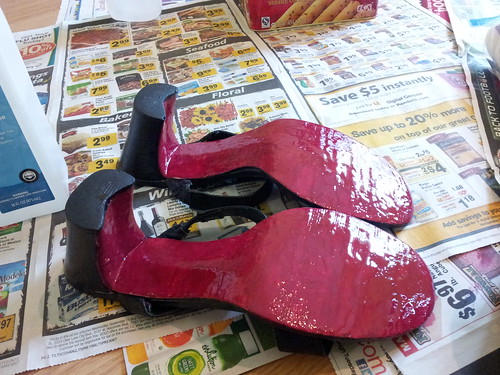
20130912_143703
Voila!


20130912_143632
DIY Christian Louboutins

Contact Dermatitis Decontamination Advice!

/ Saturday, May 25, 2013 /
Yesterday the plumber came to unclog a couple of my drains. Since my condo is pretty old (think ~40 years old), there are definitely parts that need maintenance.

Yes - the plumber did a great job. All the drains were unclogged and great. However, the adverse effect was not good. To my skin.

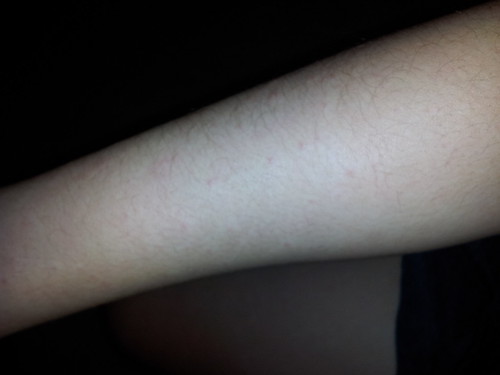
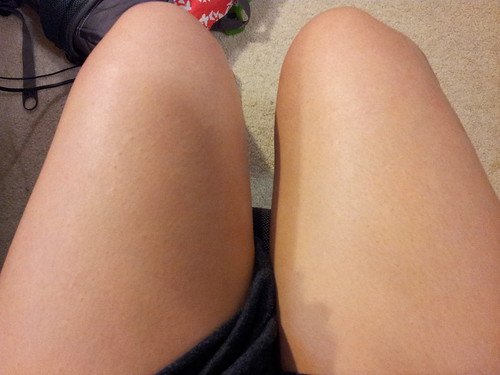
Look at this:
20130525_223218

20130525_223236

20130525_223226
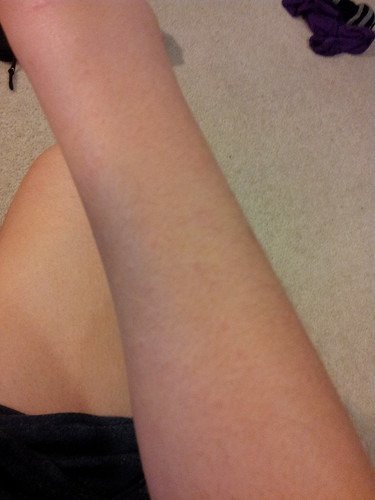
These pictures were actually taken after my skin got a lot better - when the rashes had subsided about 60%. At the height of them, they were angry red pustules that were super itchy and painful.

What are these?

These are the product of contact dermatitis - which is what happens when the skin contacts irritants such as drain cleaners and other solvents. It sucks. Yeah.

What have I been doing to help out my skin?

20130525_232051
  1. Body wash (not in picture): Changed to papaya + oatmeal. Buy a giant papaya at the store for $3 and take out the fruit. Blend it till it becomes a puree and then store it in sections in the fridge (separated into individual baggies). Then, when you need it, just take out 1+ baggies as needed and heat up the puree as needed in the microwave. Mix some oatmeal in with it. The thing is that papaya and oatmeal are soothing ingredients that are very good to the skin. They are, after all, two very simple ingredients - just papaya + oatmeal!
  2. Benadryl Itch Cooling Gel with 0.45% Camphor: This product smells terrible (due to the camphor) but it creates a cooling gel sensation that takes your mind off of the itch. 
  3. Benadryl Cream - 2% Diphenhydramine hydrochloride + 0.1% Zinc Acetate. This is a skin protectant that helps get rid of some of the itching. I bought the generic version of it because literally (1) it had the same ingredients as the Benadryl cream and (2) it was $3 cheaper. Lolz.
  4. Mometasone Furoate Cream 0.1% - This was actually a prescription-grade glucocorticosteroid that really helps out the skin. It is stronger than all of the OTC creams I've ever used. My doc basically prescribed it to me last year when I had another crazy rash from a plant. She told me that basically I could use it whenever another such rash popped out. Thank goodness it hasn't expired yet, so I could it use it for this problem!
Anyway, these are things I'm doing to help out my rashes. It's really sad that I have them but at least these help!

~Lucia

DIY Coffee Mask

/ Saturday, January 26, 2013 /

Coffee has caffeine. The end.

So what?

Caffeine is something that is actually good for the skin. It has astringent and antioxidant properties, and also helps tone the skin.

What can you do with it?

Well, you can make a coffee mask.

The cost? Virtually zilch.

Basically, what you do is:
1. Make a pot/few cups/1 cup of coffee using a coffee maker.
2. Take the strained coffee bits and put them on your skin.
3. Leave them on for 20 min.
4. Rinse off.

After you do this, the coffee will make your skin feel a lot more refreshed and smooth.

The only downside, for me personally, was that it kind of made my skin break out because of the oils in the coffee. Bummer. Although it did make my skin feel smoother and softer!

Yeah. You can try this. This is good for people with normal skin types (non-acne prone), and also for peeps who want to exfoliate/desquamate their skin, as well as people with dry skin.

That is all.

Source: 1

Review: Bye-Bye Blemish Drying Lotion

/ Tuesday, January 22, 2013 /
20121221_173636
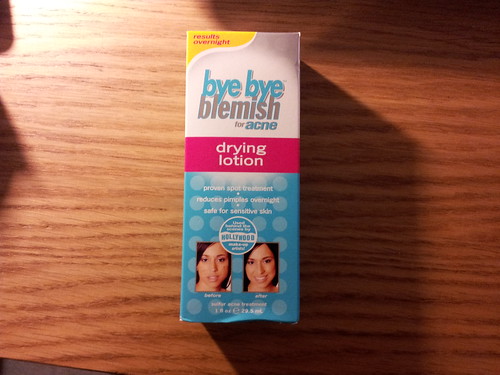
Ever wish you had a cure-all sort of one-step zit minimizer? Something that could work within one night, and not something you had to wait forever on?

This is the product, ladies and gentlemen.

Not to sound like a commercial ad script, Bye-Bye Blemish Drying Lotion is quite interesting. It basically is a spot-treatment product that you use overnight and dries up acne pimples.

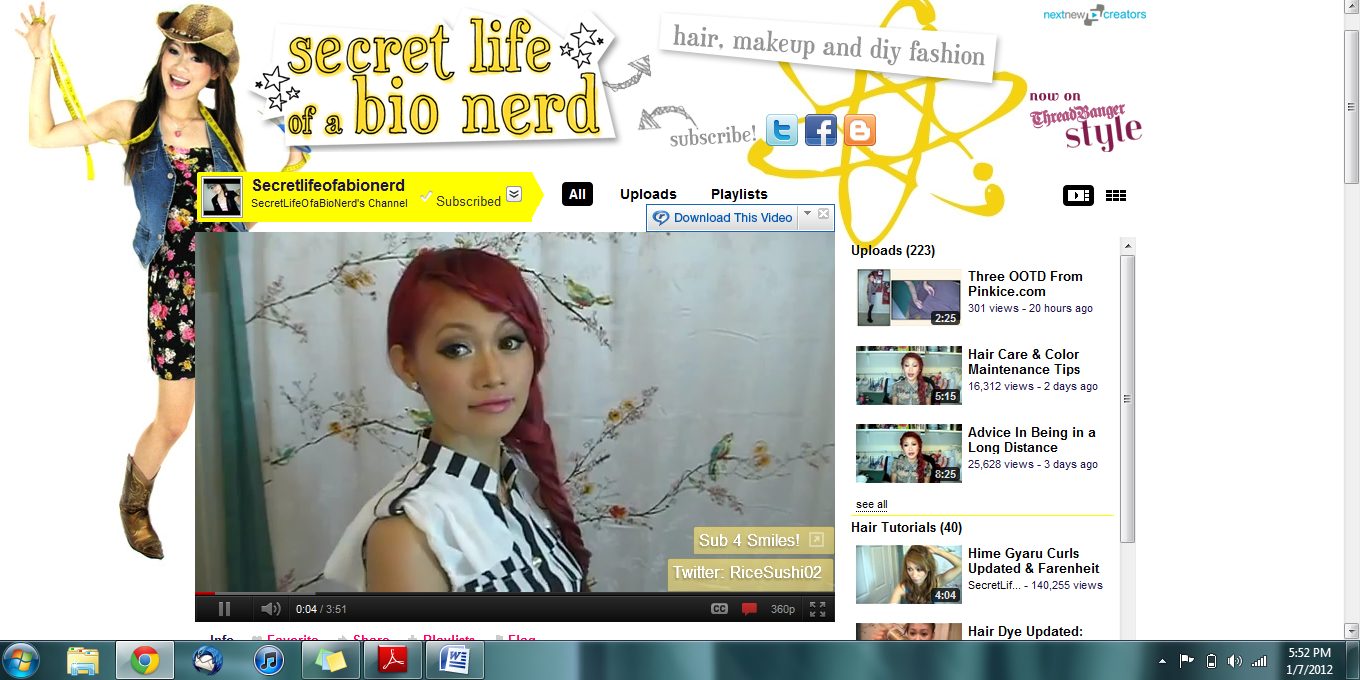
I remember finding a similar product, Mario Badescu's Drying Lotion, on a Youtube video by Secretlifeofabionerd:


This product looks really similar, a 1 oz bottle of clear liquid with pink stuff on the bottom:
Drying Lotion

I had really wanted to get Mario Badescu's product, but because it was $18 for a measly 1 oz of product, I looked for alternatives.

Thus, I found Bye-Bye Blemish Drying Lotion, which is basically just the same thing except at about 1/2 the price (I bought it for $9.75 online; you can buy it in packs of 3 on Amazon.com for about $22, roughly a little over $7 per bottle)

Here are the ingredients for the original Mario Badescu product:

INGREDIENTS: Isopropyl Alcohol,Deionized Water (Aqua), Calamine, Camphor, Colloidal Sulfur, Salicylic Acid,Glycerine, Zinc Oxide, Titanium Dioxide, Talc

And here are the ones for Bye-Bye Blemish's alternative:
Active Ingredients: Sulfur (10%) (Purpose: Acne Treatment)

Inactive Ingredients: Isopropyl Alcohol, Water (Aqua), Zinc Oxide, Salicylic Acid, Camphor, Aluminum Magnesium Silicate, Iron Oxide (CI 77491)

As you can see, they basically use just about the same ingredients. I bought this around the time I got really bad acne last semester, toward end of November-December 2012. Thus, I thought, why not give it a try?

Well, I think it was a good idea.

The instructions for using it were on the bottle as well as shown in the YT tutorial above from Secretlifeofabionerd - basically you let the pink stuff settle, and you use a q-tip to dip into the pink solution and pull it out. You dab it onto the spots onto your face and set it overnight. The next morning, wash it off.

Results? Pretty darn good.

Pros:

  • Helped control my acne
  • Got rid of/shriveled up acne spots
  • May have even prevented future acne from popping up so rampantly
Cons:
  • Really dries out your face
  • Some skin types may be very sensitive to the (potentially burning) sulfur-alcohol-salicylic acid solution
  • Terrible, strong sulfur smell
  • Actually took several days (rather than one night) for the solution to fully work
Personally, I didn't mind the smell, and I combated the dryness with very emollient gel lotions and sunscreens.

I actually really liked this product. I think I'm going to repurchase this - perhaps even in packs of 3 on Amazon!

I would definitely recommend this product to people with oily and/or combination skin, particularly for acne-prone skin. I probably would not recommend it for people with sensitive skin or dry skin. Be sure to get that pink stuff - the calomine lotion soothes the skin against the strong sulfur, salicylic acid, and alcohol.

Ideally one could probably DIY this product with calomine lotion and concentrates of salicylic acid. However, I would probably advise against it in the case of this product because it seems like this combination of chemicals could potentially be unstable, and it would be a good idea to get the "safe" product that was already manufactured to stay together longer.

I definitely feel this product is worth the money paid, and then maybe even some! Highly recommended =D


Sources: 1 / 2

DIY Hair Removal Wax

/ Wednesday, January 16, 2013 /

Inspired by Secretlifeofabionerd, this hair removal wax recipe has saved a lot of waxing frustrations, money, and time.

Don't want to spend $10 or even $15 on a trip to the spa for eyebrow waxing? Well, you can make one right at home with your own ingredients, and very simply too =D

Ingredients:
-2 tsp brown sugar (A giant bag for $2)
-1 tsp honey ($3-$5 for a large bottle)
-1 tsp water (don't need to state the price for this one)

Also:
-Popsicle sticks (I recommend the normal sized ones for eyebrows, and the big ones if you want to use it for leg hair removal) ($3 for about 150 at Michael's)
-Strips of cotton cloth (cost me $2 for a pretty large piece at the Joann's)

Directions (preparation):
1. Pour together everything.
2. Pop in the microwave for about 30 sec. Stop right after the mixture starts to boil.
3. Let cool for 10 min.
4. Strips of cloth: cut into about 3'' x 1'' strips.

Directions (waxing):
1. Spread the waxing formula onto the area of interest with a popsicle stick.
2. Use the strips of cloth to cover the wax and smooth it over. Then, pull the cloth in the opposite direction that the hair runs.
3. Wash off excess with water.
4. Tweeze stray hairs as necessary.

Results:
I personally liked this a lot more than the store-bought kits and than the salon done ones because (1) it's a lot cheaper than all other options, (2) it works effectively, (3) you can use stuff you've already got in the house, (4) you can just wash the wax off with water rather than having to cover it with other messy stuffs, etc. It does do the job!

I personally recommend this wax recipe. It really does work. I still have a ton of wax material, popsicle sticks, and strips of cloth left that I can use many, many times - perhaps up to 30-40 waxing sessions, really. That's basically about ~3 years worth of waxing material, for about $12!

Price comparison (in my experience, rough estimates):
Kits bought in store for 3 years: 5 x $5 = $25
Salon visits: 18 x $12 = $216
See how much money this saves?

I don't think I want to buy kits from the store anymore, nor do I think I will need those salon visits any time soon. This is good enough!~
/ Friday, January 4, 2013 /
All right guys and gals,

Time for some up-closeness. I'm gonna share with you some pictures that I haven't really shared with anyone else, pictures of my skin and how it's doing.

In case you don't know already, my skin type is combination/oily, acne-prone. This means that the areas around my cheeks are generally acne-free, but my T-zone (my forehead, nose, between eyes, chin, etc) is a constant war zone filled with acne problems. Not only that, the edges of my face often get acne as well.

In order to improve this, during the last 5+ years I've been trying all sorts of skincare products, regiments, lifestyle changes, etc. I've thrown tons and tons of money (or at least as much as I've been able to) to the skincare industry. This skincare blog is definitely a big part of it - detailing the progression of my skin, the products I've tried and the results I've gotten from them, as well as lots of facts I've learned about skincare in general throughout the years.

Now, without further ado, here are the pics I have. Promise: they are NOT photoshopped in any way whatsoever. I took them with the webcam from my new computer (still transitioning to Windows 8), which is probably the best camera I could find where I could properly control (as much as I could) self-taken photos.

For makeup: I do have some eye makeup on (eyeliner, mascara, eyeshadow, undereye concealer, brow powder) but nothing else. No foundation, bronzer, blush, face primer, powder, etc. I do, however, have sunscreen on (I wear it everyday).


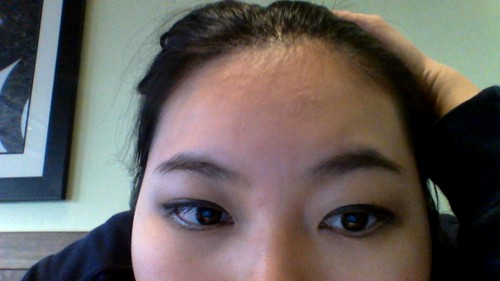
picture016

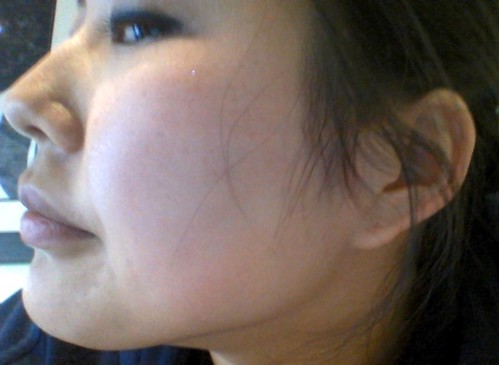
Here's a very closeup pic of my forehead. As you can see I have some little bumps on my forehead. These are part of the acne I battle all the time. I try to approach acne from a preventative standpoint - aka try to get rid of them before they erupt as serious, vibrant pustules. You can also see an acne scar between the top of my nose area and my right eye (hyperpigmentation). These pictures were actually taken post-fall semester of MS-1, after my acne had subsided a lot (due to high cortisol levels from med school stress of exams and beyond). Thus you are seeing my skin in the best light it has been in for months.


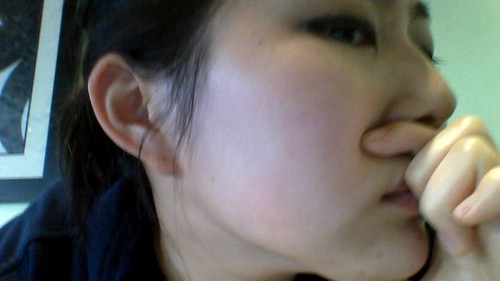
picture017

Here's a view of the right side of my face. Generally acne-free but you can see acne on my chin and in the area next to my eyes.


picture018

Here's a picture of the left side of my face. Generally same conclusions as the right side, except there's less acne around the eye area periphery.


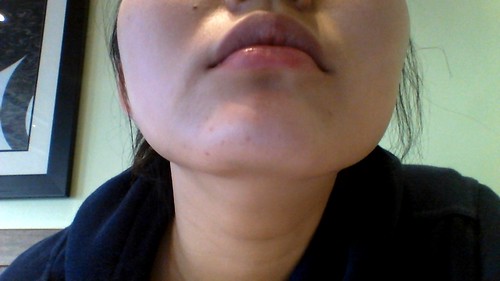
picture019

My chin area: as you can see there are quite a lot of acne marks and scars, especially compared to the rest of my face. I don't think my webcam does the marks/scars justice - there are actually a lot more than are actually shown - objectively probably 3x more. I've been trying different things for years to try to get rid of this, but these are the results I've had.

Overall I think my skin is okay. At least it has gotten a lot better since my middle/high school years. As you can see in the archives of this blog, I've gone through a lot of products. I'll definitely keep on trying new things as time goes on!

Question: can anyone tell me whether I have warm, cool, or neutral skintones? I can't really tell. I understand that most people automatically assume East Asians have yellow skintones but as shown on Musicalhouses this is not always the case. I think I have pinkish undertones but I'm not exactly sure.

In case if anyone wishes to know:

Makeup:
Maybelline Dream Mousse Concealer in Light 4-5
ELF Complexion Perfection powder (covering the concealer)
DIY eye primer
Be A Bombshell Eyeliner
Clinique Quickliner in Black
Stila Eyeshadow + ELF Eyeshadows + Estee Lauder Eyeshadow Highlight
Urban Decay Waterline eyeliner in Dime
ELF eyelid pencil (light brown), Stila Eyeshadow for brow powder
Neutrogena Healthy Volume Waterproof Mascara in Carbon Black using ELF Eyelash Curler

Such a good DIY face mask.

/ Monday, November 12, 2012 /
I've always liked using DIY products because I know what ingredients go into them, and what preservatives/chemicals with long names/etc are left out. One of the main things I like to DIY is face masks. I'm always searching for an ideal combo of ingredients that would help out my skin - brightening, cleansing, scar-lightening, etc.

Lately I've been using lime juice (freshly squeezed) with my compressed face masks but they seemed to be just too irritating. Therefore I started trying something new and ended up with something of a wholesome amalgamation.

Hence, a recipe that I concocted, taken for multiple years of research and blog-searching and fact-finding and everything:

Ingredients:

  • 1 tablespoon dissolved aspirin tablet granules (extra strength aspirin pills dissolved originally in witch hazel)
  • 1 oz honey
  • 1 tablespoon oatmeal
  • 2 key limes
Instructions:
  1. In a small microwaveable bowl, mix the aspirin tablet granules, honey, oatmeal, and 1 key lime's squeezed out juice.
  2. Heat in microwave for 1 minute.
  3. Take out, mix again, and place in the other key lime's squeezed out juice.
  4. Apply the mask using your fingers or a foundation brush onto your face.
  5. Leave on mask for 15 min.
  6. Rinse off.
The mask should dry off afterward. It felt SO GOOD afterward.
Uses of each of the materials:
Aspirin: For reducing inflammation and for exfoliation
Honey: For exfoliating, brightening, softening, toning of skin
Oatmeal: For soothing purposes, for moisturizing and basically placating the skin, and neutralizing the lime
Lime: For brightening, (even whitening), lightening (acne) scars, etc.

(I'm not going to post a picture of the face mask on my face on here, because it looks like I have throw-up on my face! But trust me, it feels SOO good afterward. And my face was not stinging at all from the lime juice.)

If you try this recipe, lemme know how it goes! Peace out!

DIY natural deodorant

/ Tuesday, September 4, 2012 /
So many articles lately are talking about how toxic aluminum-based deodorants/anti-perspirants can be. I will not go over them, as there are countless articles that go over about it better than I could (these articles are listed at the bottom of this post).

One of the better ways to go around this is to make your own deodorant using other products. I've made a recipe that I think works pretty well so far. Of course, this is not my own recipe that I came up by myself - I've linked below a lot of places I got sources from.

My recipe:

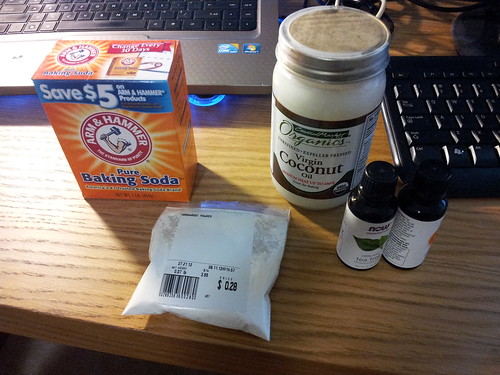
20120721_160526
1 tablespoon arrowroot powder ($0.28)
1 tablespoon baking soda ($1.50)
20 drops tea tree oil ($10)
10 drops orange oil ($8)
3-4 tablespoons coconut oil ($8)

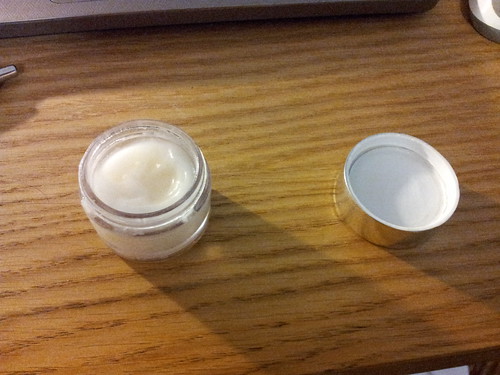
Mix it all together thoroughly, and put it in the fridge to set (the melting point of coconut oil is 77 deg F).

End result:

20120904_185044

And guess what? It really does work well! Now I don't have that bad stuff and don't feel guilty about putting on deodorant anymore. And it's really cheap too - can make batches after batches for a very low price! (See the prices I listed for the full-sized products above. Overall, per batch, it's cheaper than any natural deodorant from stores, comparable to drugstore priced, aluminum-containing deodorant).

Hurray! If you try this, lemme know how it works out =D

Aluminum-based deodorants/anti-perspirants:
http://chemistry.about.com/b/2011/07/02/antiperspirant-health-hazards.htm
http://www.care2.com/greenliving/6-alternatives-to-toxic-deodorants.html
http://health.howstuffworks.com/skin-care/underarm-care/tips/is-antiperspirant-toxic.htm
http://www.futurederm.com/2008/09/30/does-it-work-secret-clinical-strength-anti-perspirant/
http://www.futurederm.com/2009/03/20/deodorant-parabens-good-aluminum-bad/
http://health.yahoo.net/experts/skintype/deodorant-and-anti-perspirant-ingredients/
http://voices.yahoo.com/the-health-risks-behind-antiperspirants-deodorants-14097.html?cat=69

DIY deodorant links:
http://lanapurcell.tumblr.com/post/5065222525/why-i-heart-coconut-oil-diy-deodorant
http://www.vintagesavoirfaire.com/2012/04/diy-coconut-lime-deodorant/
http://www.good.is/post/strong-enough-for-a-hippie-diy-deodorant-to-handle-the-sweaty-season/


SIUP/TTUP (Normally Project X Pan?)

/ Tuesday, July 10, 2012 /
This weird title = Stuff I've Used Up/Trying To Use Up


I know the title of this series is usually called Project X Pan, where X = the number of products one wants to use up. However, I'm not too creative with these titles, and also, a lot of these products don't actually have pans, so I'm just going to call it this for now.

Anyways, eponymous to the title of the post, here are the products. I've also provided several mini-reviews for the products as well.


The products above are:

1.     Fresh's Sugar Kisses Mini Lip Duo - this is a duo pack of miniature lip balms that is this year's birthday gift from Sephora. One of the products is not tinted, and is the original Sugar Lip Treatment in SPF 15. The other product is tinted a slight reddish/pinkish color, and is the Sugar Rose Tinted Lip Balm. I've used up the original Sugar Lip Treatment (it only took me ~5 weeks), but I'm still working on the Rose (the tinted one). These lip balms are actually pretty good! They smell really sweet, are very moisturizing, and do not make my lips feel really sticky, especially compared to lip glosses. They also have SPF, which is really nice protection for your lips - your lips need sun protection as well! The one downside is its price - each of these full-sized products cost $22.50 at Sephora, which is, at least in my opinion, quite a hefty price for a lip balm. Especially since each of these are only 0.15 oz. Burt's Bees lip balms, which I think have similar effects to the Fresh ones, cost only $3 each for the same size, 0.15 oz. This means that you can get 7.5 Burt's Bees lip balms for the price of one Fresh lip balm. Seriously?!?!
2.     ELF Brightening Eyeliner in Coffee - I bought this brown colored eyeliner in a pack of 5 items (3 liquid eyeliners in coffee, black, and plum, as well as a Brightening Eyeliner in Black) as a gift set from Target.com. I tried the liquid eyeliners (see my review here) and gave the black eyeliner to one of my friends as part of a bigger set of various makeup products from different brands. The concept of this eyeliner is pretty cool; it's supposed to, eponymous to its name, brighten the eye, and comes with its own pencil sharpener as well. However, I don't think it actually lives up to its expectations; the pencil sharpener does not work well (it is not good at sharpening) and it doesn't really brighten up my eye as an eyeliner. It provides only a slight brown color, and is not very vibrant. I currently use it on my brows, because its light brownish color provides some leeway for me to fill in my sparse brows. However, at the same time, I don't really like it on my brows because it feels really cakey, if you get what I mean. I'm trying to use up this product as quickly as I can in order to, literally, get rid of it. At the beginning, when I first tried ELF products, I really liked them, especially for their price (this eyeliner retails for only $1 on the ELF website) but their products are super hit-and-miss. I think the one product I've liked consistently is their eyelash curler (also $1 on the ELF website). this will definitely not be a repurchase for me.
3.     Wet N' Wild ColorIcon Brow & Eyeliner in Dark Brown - I bought this eyeliner at a Walgreens about 2 years ago. These eyeliners also cost only $1, but they are a lot longer than ELF's eyeliners (I think the Wet N' Wild ones are about 7-9 inches long, while the ELF ones are shorter, perhaps around 5 inches. So thus, per dollar, you get a lot more product. Also, this eyeliner is fantastic in color - it is super dark, and can be super creamy and smooth, especially if you heat it up with a blow dryer or something. The only problem I have with this eyeliner is that it smudges a lot, and smears a lot. It is not known to be a kohl eyeliner, which I know is supposed to smudge, but this eyeliner still smears. Usually, when I wear this eyeliner, I have to set it with powdered eyeshadow or something. Thus, I'm trying to just use it up. Do you see how much of it I've actually already used up? It's gotten to the point that it's actually shorter than the ELF eyeliner. I bought a Sephora Flashy Waterproof Brown eyeliner with a Sephora gift card that I got from a friend for Christmas ($8), so I will be testing it out after I finish both of these brown eyeliners, and see how that works.
4.     Maybelline Dream Mousse Concealer in Cream (Light 4-5 shade) - this concealer is actually a repurchase for me. I originally bought one at Walgreens when it was going on sale (the product was just about to be discontinued) for about $4, and I absolutely loved it. It worked really well, was really smooth and creamy, did not show my fine wrinkle lines, and stayed put throughout the day. I liked it so much that about a year after I bought my first one, after it was discontinued, I bought another one on Amazon for about $6. I think it's more expensive now on Amazon, because the supply of it is less, now that more people have bought and used up the discontinued stock (see this link for current Amazon prices). I still really do like it, but I think I want to try other brands of concealer after I finish this jar of it. I really do recommend it. However, I have some other concealer products, such as Maybelline's FitMe concealer in shade 25 and Sheer Cover Concealer Duo in Light/Medium that I got at Target and January's MyGlam bag, respectively, that I want to try out. Thus, I'm trying to finish this product off.
5.     CoverGirl's Eye Enhancer's 1-Kit Shadows in Pink Chiffon - this is the product that is in the little white jar. I know, the jar is not actually CoverGirl; in fact, it's actually a department store brand called Omorovicza (from Hungary). It originally held some sample of day eyecream, but after I used it up, I just cleaned it out with alcohol, just in case, so that it could be used to hold other products if needed. One day, I actually dropped the Eye Enhancer, and it broke apart into pieces. So, I just put the pieces of broken eyeshadow into the Omorovicza jar, smashed it into pieces, and am currently using the rest of it as a pigment. Don't believe me? Here's a picture of the inside of the jar: 

Anyway, as you can see, there’s very little product left inside the jar. I’m trying to use it up so that I can move on and try other highlight products. BTW, this serves as an excellent highlighting eyeshadow – for your brow bone and your inner eye corner and stuff. I think this was actually featured for a Selena Gomez look on some Seventeen/Cosmopolitan/other superstar magazine or something!


Oh yeah, and one of these Eye Enhancers costs about $3 at Target and the like. Pretty good deal.


6. Santee’s Shimmer EyeStick in Blue – I think this is a dupe for some of NYX’s Jumbo Eyeliners. Santee’s eye sticks can serve as eyeshadows, eyeliners, etc, and can also serve as great primers. They also are smudgable, and don’t need any sharpening, because they are twisted upwards from the bottom. I am trying to use this product up because, well, I have used it for quite a long time, and have actually barely made a dent in it. It sort of feels like I'm in a makeup rut, if that is what it's called. I took a break from using it for a few months, and now, I think I'm going to start using it again in an effort to finish it. Hmm... perhaps 5 years down the line, I'll finally finish it?

I got this eye stick, along with several other ones, from Amazon for about $17. If you were to get 8 NYX jumbo eyeliners, it would cost you about $36 - more than twice the cost of these eyesticks. Pretty cool, huh?

7. There is one last thing, a palette, that I have been trying to finish for quite awhile:

This product is ELF's 27-piece Shimmer Palette. It is a limited edition palette, but ELF sells a similar one on its website for $15.  
According to the website, this palette has:

The Studio 27 Piece Mini Makeup Collection includes:
9 Eyeshadow Shades
1 Cream Eyeshadow Shade
1 Blush
1 Bronzer
10 Lip Gloss Shades
1 Brow Powder
1 Eye Liner Pencil
1 Dual-ended Eyeshadow Applicator
1 Face Brush
1 Small Precision Lip Brush


When I first started looking into ELF products, I thought the concept of such a palette was pretty cool. After all, all of these products combined into one package! However, after tons and tons of use, I think that the novelty of this palette is starting to wear out. I depotted and got rid of the cream eyeshadow shade, and one lip gloss shade, because they were getting really sticky and gross from the powder eyeshadows. Since I don't use bronzer, I started using the bronzer as a neutral eyeshadow, and it is pretty good as an eyeshadow, especially with a primer. I used some of the blush to make a DIY lip gloss as well (just take some of Carmex's lip balm and mix it with the blush, so that it makes a nice pinkish color; put the product in a clean contact lens case or a small jar). I think the eyeshadows are pretty good, but they are pretty crumbly by themselves, so in order for them to not fall out, you need to put on a good primer underneath. The lipstick colors - let's just say they are OK, but I don't like their feeling, and they don't have a very good texture. I want to actually depot the eyeshadow, blush, and bronzer shades, but (a) I don't really know how and (b) I don't actually have an empty palette to put them into. So thus, I'm just trying to use up all of the eyeshadow colors, as well as the eyeliner, and as soon as I do that, I'm just going to chuck it out.

BTW, the brushes and applicators? They don't really work well. The eyeliner is actually pretty good, except it's really hard to maneuver because it is so short. Even with my small hands.

Anyways, that's all I have for now. Whew! That was a long post. Thanks for bearing with me this long. Have a great day everyone!

<3

January's YT MUA of the Month!!!

/ Friday, January 27, 2012 /
Let's see, so far we've done:

Xteeener
Gossmakeupartist
kandeejohnson
daisycheekz

This month's Youtube Makeup Artist of the Month is.....

secretlifeofabionerd!!!!!


As you guys have probably seen before in some of my previous posts, I absolutely ADORE secretlifeofabionerd. This is the YT screen name of Kieu L. Cao, and is a fashion student based in Houston, Texas. She was originally from Nebraska but moved to Houston to attend fashion school.

What I really like about KL is that she offers not only stuff on makeup, but also fashion (after all, she IS a fashion student!), hair tutorials, advice about life, and comedy.

Click the jump to read more!

The scariest face mask monster in the world!

/ Thursday, January 19, 2012 /
Hey guys,

Today I'm gonna share with you all one of my skincare regiment secrets.

It's these:

What are these? These are called compressed face masks. They're a huge beauty skincare fad in East Asia. What they can do is, if you make your own concoction of liquid stuff, and put these in, they literally expand out and become a face mask.

Presently, there is a line of face masks that are pretty awesome, sold in East Asia, by My Beauty Diary:


:
My Beauty Diary Facial Mask - Natto (10 pcs)
http://www.amazon.com/My-Beauty-Diary-Facial-Mask/dp/B001R654TS/ref=sr_1_2?ie=UTF8&qid=1323290274&sr=8-2

http://www.sasa.com/SasaWeb/eng/product/viewProductDetail.jspa?itemno=103479202002


These can be found at www.sasa.com, www.amazon.com, eBay, etc.
However, the thing is that these things run at about $14-$15/box of 10 masks, which is pretty pricey, if you think about it in the long run.

Thus, hence comes out with the compressed face mask!

Here's a tutorial made by secretlifeofabionerd on it, which I featured on a blog post way way early on:

My version is very similar to her's. I use a 1:1 ratio of cucumber juice and lemon.

What I do is I:
-Slice up a cucumber into thin slices
-Cut a lemon into wedges
-Throw the slices of cucumber into a blender
-Squeeze the lemon juice on top of the slices of cucumber (don't worry if seeds get in)
-Put the blender on high-speed until everything is pureed
-Take a CLEAN cheesecloth, or a CLEAN face cloth you don't mind getting dirty, and dump the pureed mixture into it, and squeeze that juice into a cup. (Note: this step can be very messy!)

Then, when I need the mask, I:
-Put the mask into a dry cup
-Mix up the concoction, and spoon it onto the mask
-If it is very cold outside, then I heat up the mask + concoction for about 10 seconds in the microwave.
-Open up the mask, and put it on my face
-Leave on for 30-40 min

After I feel that all of the goodies from the cucumber and lemon have gotten onto my face, I take off the mask, and rub my face with the cloth. Then I dump it.

This stuff is sooo good, guys and gals. It helps a lot out with oil control, helps prevent me from getting zits, but most of all, it is EXTREMELY EXTREMELY fresh.

Look at it! It's so green and fresh!

Wanna see a scary face monster?

Ahhhh!!!!

Yup. That's what it looks like. A unibrow, war-torn face monster. (jk I actually don't have a unibrow. Although this picture might suggest otherwise)

I gave a bunch of these face masks to one of my friends during a Secret Santa Exchange/Potluck party we recently had at university. If she ever gets a chance to look for how to use them, here's the place!

Anyways, hope this is helpful!

<3

DIY Eye Primer

/ Thursday, December 8, 2011 /
Hey guys,

I recently decided to try to make my own DIY eye primer. I've used the ELF eyelid primer for awhile, but alas it has run out. I could just pop into the store and buy another one for $1, but I saw this awesome recipe for primer online, and I thought, why not?

My source is here:

Anyways, here's the formula I used:
1. Body butter (any brand, any scent; I used the Tree Hut Body Butter in Coconut Lime)
2. Concealer, or foundation (any brand; I used Maybelline FitMe Concealer in Medium 20)
3. A small jar
4. Toothpick or paper clip (unfolded) for mixing

So the formula is basically just a 1:1 mixture of body butter and concealer. Just mix it really well in the jar with the toothpick or paper clip.

Pictures:
1. Body butter


2. Concealer:

3. End product:

4. Here's a comparison of the use of eyeshadow with and without the primer. The swatch on the left is without any base, while the one on the right is with the DIY primer. The eyeshadow is the brown shade from the duo 03 Ginger by Estee Lauder.


Hope this DIY eye primer formula works! Try it out if you would like, and tell me about the results! If you already have body butter and eyeshadow, this can be for less than the $1 + some for gas for getting the ELF eyelid primer, and will definitely save you $$ if you use this instead of Urban Decay Primer Potion or Too Faced Shadow Insurance!

Let me know if it works for you.

<3

Zits......

/ Monday, April 18, 2011 /
Like I've always noted, time and time again, I hate zits.


I always get them at the most inopportune moments. i.e. just before a date, a formal, when I'm going to visit family friends, etc. Usually it happens **around that time of the month**, ladies - u totally understand! XD


http://faithfulservantmagazine.com/?p=11


I usually get zits in my t-zone or on my cheeks. They show up on my skin like little red dots, making an "acne mask" that looks kinda...well, stupid, pitiful, etc.


Are you someone who gets acne at random times?
 http://mrsoslife.blogspot.com/2010/10/one-of-them-was-acne.html


I have a regiment, that, although sounds kinda weird, works, at least on me.
The ingredients are really cheap (trust me, I'm a poor college student, I know how hard budget hits can be!), and they are very easy to make or buy. A lot of the stuff that I use can be found around the home as well.


Me (cartoon sense?):
 http://www.fairloanrate.com/2010/10/09/bankruptcy-on-student-loan/


My acne regiment:
Morning:
1. Wash face with Biore Steam Activated Cleanser
 http://vouchercodes.ca/free-stuff/free-biore-steam-activated-cleanser/
This cleanser is available for $6 at Target, and there are frequently sales and coupons so you might even be able to get one for $3 or $4!


2. DIY Acne toner - I've already talked about this in a previous post, but in case you guys can't find it here it is.
Ingredients:
a. Witch hazel, 2 oz
Witch Hazel: Cheap WalMart Generic (Aaron Brands) http://badgerandblade.com/vb/showthread.php?ltr=W&t=112482
This was $1.50 at Wal-Mart; you can also get it for $1.77 (~$2) at Target as well. The bottle is actually 16 oz of stuff so you can use it for quite awhile.


b. Aloe vera gel, ~1/2 tsp
 CVS 100% Pure Aloe Vera Gelhttp://tinyurl.com/4xlak9z
This you can use for A LONG time, and it was only $3. You can also use it for sunburns, face masks, etc.


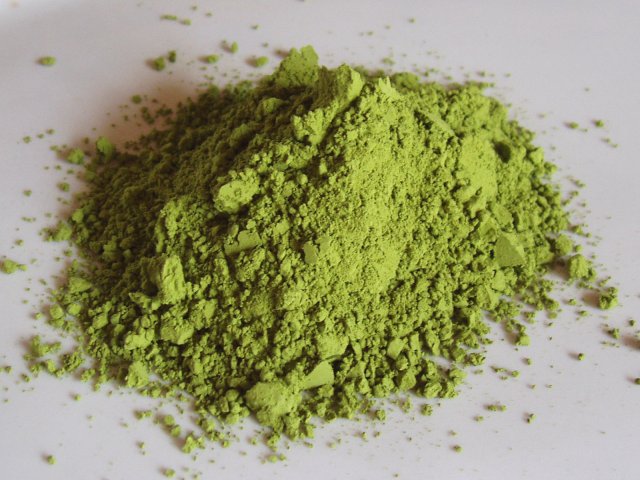
c. Matcha - a pinch
 http://www.drlisawatson.com/matcha-superpowdered-green-tea
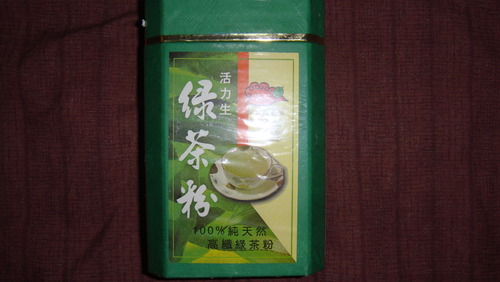
This is kind of expensive, but I got 1/2 pound of it for $22 off the internet (Amazon). You can also use it to make teas, ice cream, milkshakes, smoothies, etc etc etc. It has so many benefits for your health - speeding up metabolism, containing catechins that prevent cancer, etc etc etc. Of course you don't have to add it if you don't want to. After all, it is DIY!

You can currently get it here:
Green tea powder, Amazon.com (~$36)
 
http://tinyurl.com/452gjh3

d. Aspirin - uncoated, generic
 http://vitamincgoodness.blogspot.com/2011_04_01_archive.html
Mix it all up into a small bottle (~4 ounces), adding in first 10 tablets of aspirin, then 1/2 of the witch hazel, then the matcha, and the aloe vera. Then, add the rest of the witch hazel, and shake it up!!!

When using it, first shake it up. Then, apply with a cotton ball or pad. There will be little aspirin granules on your face, but they can be removed with another cotton pad/ball or a makeup brush (face brush, complexion brush, kabuki brush, etc).

3. Clean & Clear Finishes Pore Perfecting Moisturizer, SPF 15
 http://beautycreams.buyersreviewguideonline.com/clean-clear-finishes-pore-perfecting-moisturizer-spf-15-1-7-oz/


This was $5 online, http://tinyurl.com/3p87mb6. So useful, and contains SPF as well!


Evening routine:
1. Biore Steam Activated Cleanser
2. DIY acne toner
3. Jergen's Sensitive Skin Relief Lotion
http://www.drugstore.com/jergens-sensitive-skin-relief-fragrance-free-daily-moisturizer/qxp223867

I got this at Target for $5, and trust me, it lasts FOREVER. I use mine on my entire body - hands, arms, legs, face, etc - and the bottle lasted for an entire year. 21 ounces in this bottle! It works really well =D

4. Once a week, use apple cider vinegar for spot treatment, applying with a Q-tip:
 http://completelycoupons.net/free-0-65-cent-heinz-vinegar-walmart-publix

This you can get probably somewhere around the house! Or you can get it for around $1 at any supermarket, Target, Wal-Mart, whatever. Very useful for other purposes as well - cooking, cleaning, etc etc etc.

Be sure to use the DIY toner after the vinegar because the vinegar is very stinging though; alternatively you could dilute the vinegar with water to soften it and make it less harsh on your skin =D

Hopefully this will help out!!! Trust me, there's a lot of science that's involved in this, but I won't bother you guys with it since this is really the solution. (No worries, I do know the science - I'm a bio major lolz) Alternatively you could look up the science behind it via googling or something, if you really wanted to find out.

http://www.super-science-fair-projects.com/physics-science-fair-projects.html

That's it for now.... ttyl!
<3, chynagrl

Awesome DIY Tutorials!

/ Thursday, April 7, 2011 /
Cucumber + Papaya Soap:


Lip gloss (peppermint + cinnamon):


Skin whitening products:


How to take care of hair:


Hair removal:


Skincare routine:


Acne scar removing masks:


Wavy hair with Epsom Salt:


Enjoy!

My DIY acne toner + other skincare remedies

/ Monday, April 4, 2011 /
Hiya guys!


Updated skincare routine!!! I have now added a homemade toner, modified with slight editions from different sources + advice. My skin has never been clearer =D


Every night, I use a homemade DIY acne toner. This toner was originally inspired by secretlifeofabionerd's Youtube video on an aspirin toner:


I've modified this to adapt to what I like best, and added some other stuff.


My ingredients:
1. Witch Hazel, CVS Generic (~$3)
 http://www.kaboodle.com/reviews/cvs-witch-hazel


2. Uncoated Aspirin, CVS Generic ($1)
CVS Aspirin 325 mg Uncoated Tablets http://tinyurl.com/3ecsx45


3. Aloe Vera (100%), CVS Generic (~$3)
CVS 100% Pure Aloe Vera Gel http://tinyurl.com/44g6w22


4. Small container (preferrably screw-top; I used an old vitamins bottle that I had finished) - free! (or you can buy one from Wal-Mart or Target or any other generic store for ~$1)


5. Green tea powder, Amazon.com (~$36)
 
http://tinyurl.com/452gjh3


I know this last ingredient is really expensive guys, but trust me, it's TOTALLY worth it. Currently, it's the most cost-efficient green tea powder (matcha) available on Amazon, and is much cheaper per ounce than what you would find at a health food shop such as Whole Foods or GNC. In addition, it's really versatile - you can make green tea with it, or green tea ice cream, green tea smoothies, green tea popsicles, everything! And this lasts you a LONG time - I've used my bag (10 oz) for about 1 year and I'm not even halfway through. And that's coming from a person who drinks at least 4 cups of green tea a day. Such a great buy!


Anyways, here's the procedure:
1. Inside the bottle, add 5 - 10 aspirin pills, depending on how strong you want the toner to be.
2. Add 1/2 teaspoon of green tea powder.
3. Add 2 ounces of witch hazel.
4. Add 1 teaspoon of aloe vera gel.


Close up the bottle and shake it up! Soon, the aspirin will dissolve, and the green tea powder, aloe vera, and all of the other goodies will be there for your use.


To use: Get a cotton ball, and soak it with the toner solution (be sure to shake up the toner before using!) Gently pad your face with the cotton ball, making sure to get any acne spots. Allow the toner to dry. You will find some grains of aspirin left over on your face, which you can get rid of using another cotton ball or by brushing off using a large makeup brush.


I use this once a night, and trust me, it's made my skin SO much better. In fact, one of my mom's friends saw me the other day and asked me for "the secret ingredients" to how my skin became this way. It definitely works.


Oh yeah, here's a tutorial I found just today on another aloe vera gel mask by secretlifeofabionerd:


Enjoy guys and gals!


<3, chynagrl

Labels

Search This Blog

Followers

 
Copyright © 2010 Vitamin C Goodness, All rights reserved
Design by DZignine. Powered by Blogger